Tire Specifications:
There are two tire sets for tires, including the tire manufacturer’s and the vehicle manufacturer’s specifications. Whenever you take your car to a tire shop to change the tires, they must meet these specifications by law. You can get a tire that goes above these specifications but never below.
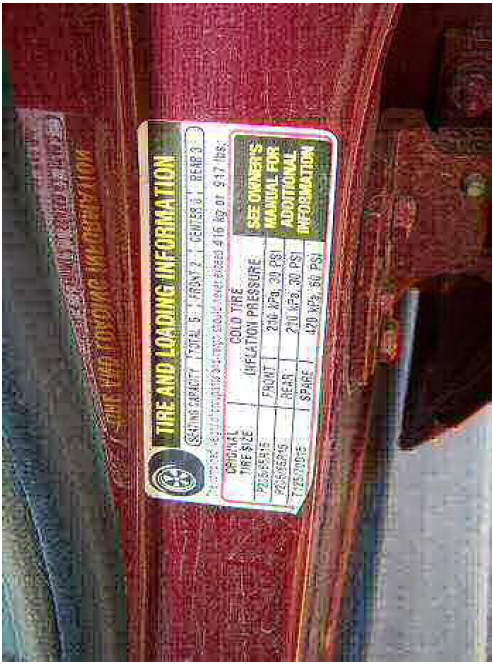
The vehicle manufacturer’s specifications include speed rating, load and size. It is located on a sticker on the driver’s door jamb of the vehicle and in the vehicle owner’s manual.
.
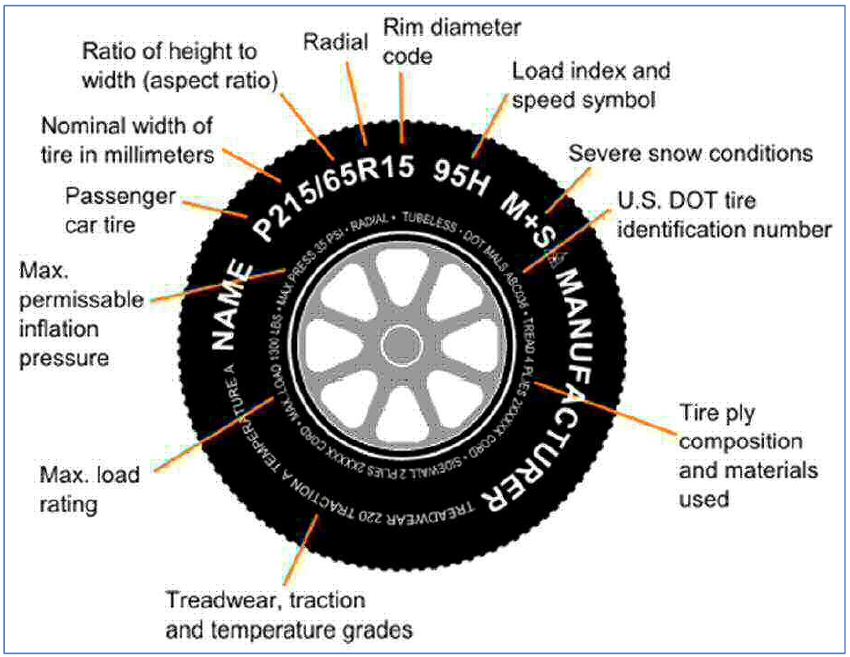
The manufacturer specifications include the tire size, load, pressure, temperature, speed rating and tread wear. The tire manufacturer’s specifications indicate what the tire is made to withstand. These specifications can be found on the wall of the tire itself.
The most critical number for the ordinary person to recognize is the recommended tire pressure on the vehicle manufacturer’s specifications on the driver’s door jamb sticker. (The tire manufacturer’s specifications on the tire itself include the maximum pressure the tire can have, yet the maximum pressure is only sometimes the best pressure for the vehicle).
How to Check the Tire Pressure:
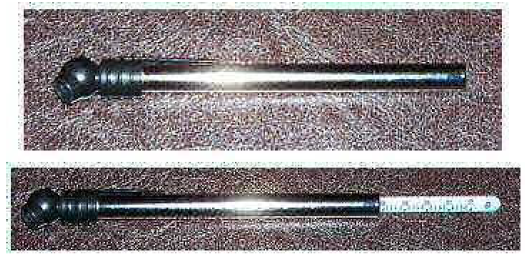
Tire pressure gauges can be purchased at auto parts stores and service stations (sometimes a little as $1, but could be $3-$7). Sometimes a gauge is included with the air dispensing stand’s air hose at the gas station.
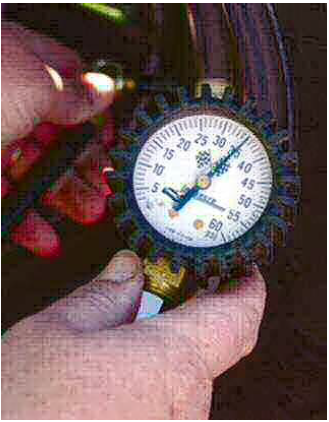
Follow these steps to check and correct the tire pressure::
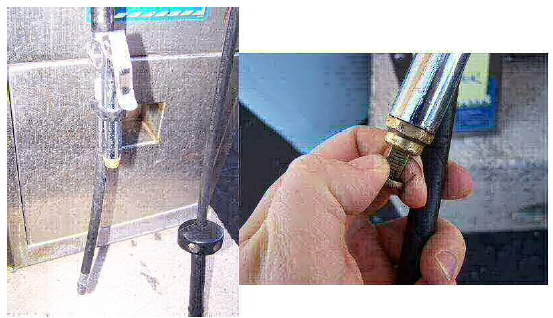
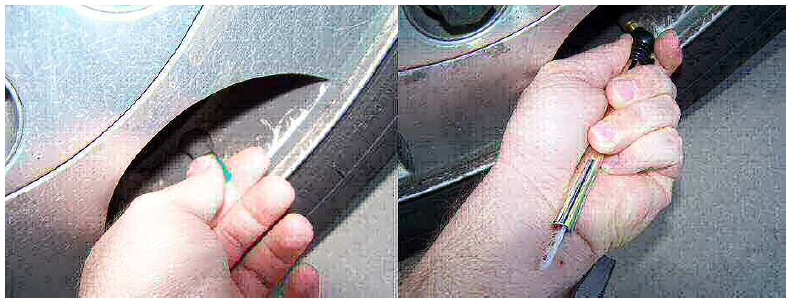
- Remove the valve cap of each tire
- Align the gauge up to the valve
- Press the gauge onto the valve with firm direct pressure and then release. You’ll see the measuring stick get pushed out of the other side of the indicator (on a pen gauge).
- Replace the valve cap
Tire pressure is measured in PSI (pounds per square inch) or KPA (Kilopascals), simply units of measurement for pressure. (Pressure is a force distributed over the surface area)
Wheel Alignment:
Tires can wear rapidly if they are not aligned properly, or the vehicle can pull to one side while driving. There are three angle measurements that are used in tire alignment: camber, toe, and caster. Knowing these angles is necessary for any tire technician. In addition, knowing these angles can be helpful for anyone trying to communicate with tire technicians.
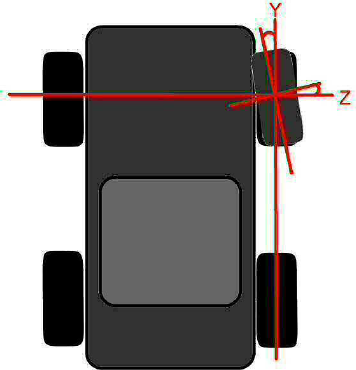
In order to understand these angles one must consider the planes of the vehicle, which are ways of dividing the vehicle in each of its three dimensions (length, width and height). The horizontal plane, often depicted in math as the X plane, divides the vehicle into top and bottom parts. The vertical plane, often depicted in math as the Y plane, divides the vehicle into right and left parts (or driver’s side and passenger side). A second vertical plane which intersects the first vertical plane at 90 degrees is often depicted in math as the Z plane, and it divides the vehicle into front and rear parts.
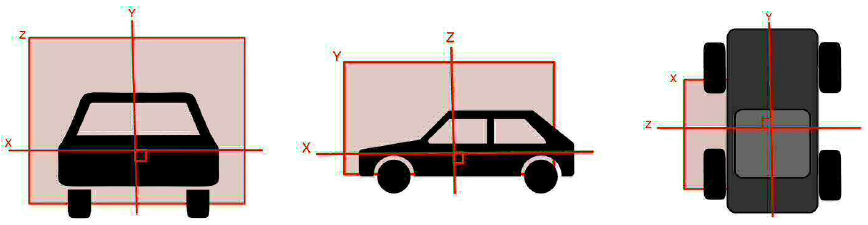
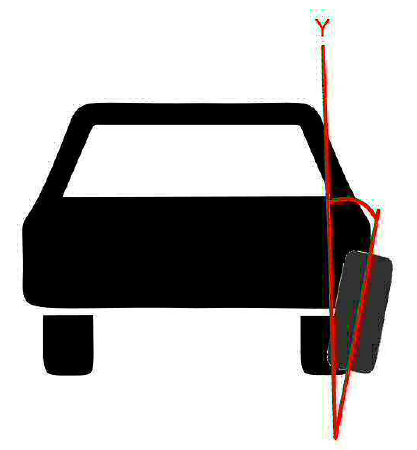
The camber angle lies on the Z plane. (Imagine looking at the tires from the front of the vehicle). A camber angle of zero is when the wheel is vertical. If there is any camber, the revolution deviates from the vertical or Y planes. The camber should be zero in many vehicles, but some may vary by 2-3 degrees.

The toe angle lies on the X plane and deviates from the Y and Z planes. (Imagine the vehicle from a bird’s eye or a top view). A toe angle of zero is when the wheels are parallel on the Z and Y planes, which is not entirely how the wheels should be, at least not the front wheels. When considering the toe, consider either the front or rear wheels as a pair.
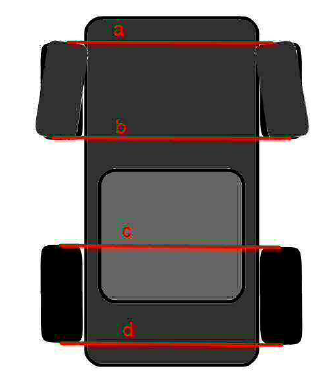
If a right wheel is turned inward while the left wheel is straight, or if both wheels are turned too far inward, or both are turned outward, etc., then an abnormal toe angle is present, and the wheels are not aligned.
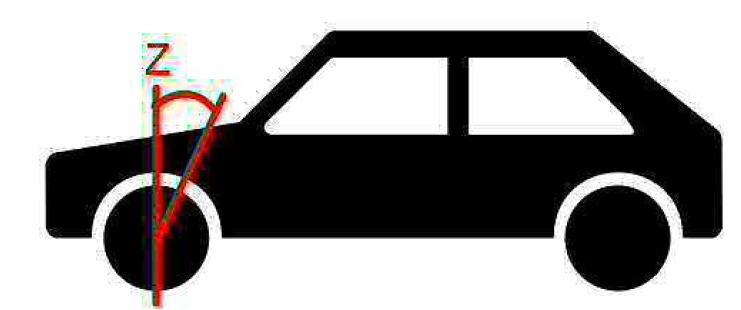
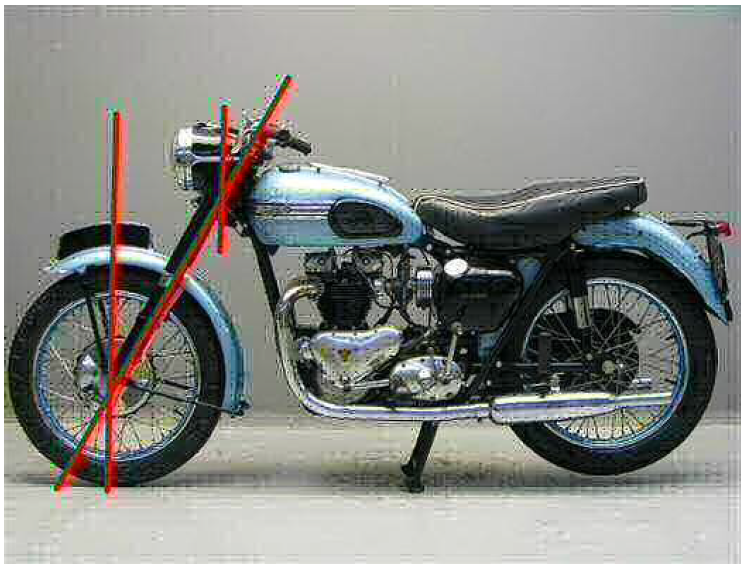
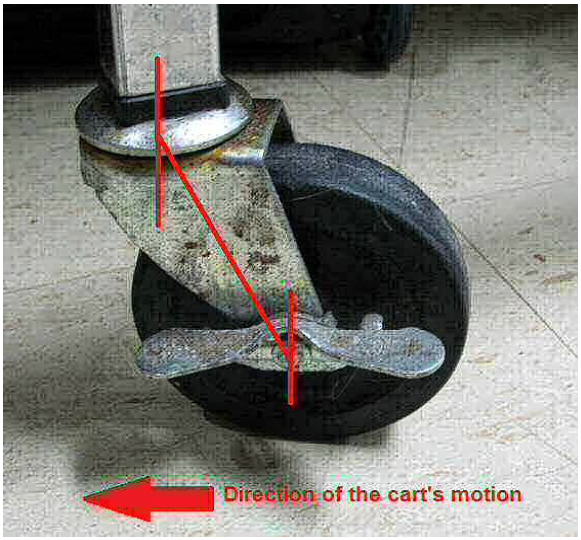
The caster angle is an angle which lies on the Y plane and deviates from the Z plane. (Imagine looking at the vehicle from the side). Most devices with steering capability do not have a caster angle of zero. When the deviation is towards the rear, the caster is considered positive. When the variation is towards the front, the caster is considered harmful. On motor vehicles, the caster is usually positive (the higher ball joint will be closer to the rear than the lower ball joint) and helps the car to drive straight even when the steering wheel is hands-free. Since the wheel blocks the caster’s view on vehicles with four wheels, it is most easily visible on motorcycles and bicycles. Think of the two braces that come down on both sides of the front wheel. Notice how the handlebars are closer to the rear than the front wheel’s centre point (fulcrum). The front wheels of shopping carts have a negative caster. The physics of a negative caster allows for the front wheels to turn counterclockwise as the coach is turning clockwise so that the coach is easier to manoeuvre
throughout the store.
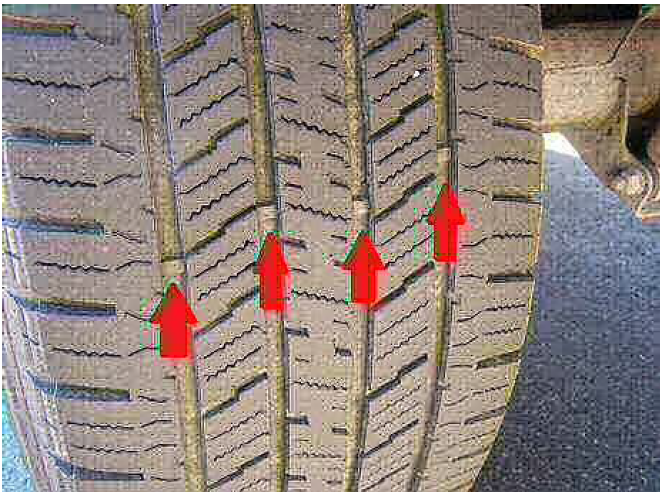
Wear Bar:
The wear bar is a horizontal bar moulded into the tire between the treads. The wear bar indicates safe tread depth. It is usually about 1/16 of an inch measured from the valley of the impression but lower than the tread when the tire is new. As the tread wears down, the wear bar becomes more visible. The tires should be changed when the impression is even with the wear bar.
How to Change a Tire:
Knowing how to change a tire is helpful if you get a flat while driving. Every other time your tires get removed, rotated and replaced, it will be by a tire technician.
Every vehicle has instructions for using the jack and other tools as necessary to change the tire. Some details can vary by make and models, such as the jack and spare tire storage location. Consult the owner’s manual of the vehicle. Also, there will often be a sticker with instructions for the jack and spare tire.
Here are some general guidelines for changing a tire:
- Make sure the vehicle is on level ground
- Apply the parking brake
- Remove the spare tire and tools from the vehicle
- Use wheel chocks to block the wheels opposite of the wheel you’re changing (i.e. if you’re changing a rear tire, then put the chocks in front of the front wheels).
- Wheel chocks are similar to triangle-shaped door stoppers. When chocks are included with the tire changing kit, they should be used. However, they are only present in some vehicles. Cases, where they’re not present may include vehicles with a rear parking brake and front-wheel drive.
- Loosen the lug nuts before lifting the vehicle, but do not remove
- Pump or crank the jack to lift the car using the proper lift points
- Remove the lug nuts
- Remove the flat tire
- Place the spare tire
- Replace the lug nuts snug
- Lower the vehicle
- Torque the lug nuts (tighten them as much as possible after the vehicle has been lowered)
- Replace the tools in the appropriate location for future use.
- Carry the flat full-size tire to the tire shop with you.
- Spare tires are often smaller than the full-size tires regularly driven on. Light tires are only meant to transport the vehicle to a tire shop when needed and should be changed immediately. They should be kept from being driven on regularly
.
Tire Disposal:
Whenever you purchase a tire, the tire shop is responsible for adequately charging a disposal fee and disposing of the old tire. The dump may charge you a price. You can take it to a tire recycling facility to dump them for free or even get paid..
Related posts:
 Keep Your Car Wash Running Smoothly: Essential Maintenance Checklist
 The Hidden Costs of Luxury Car Maintenance: Why You Need a Workshop Manual to Save Money
 Efficient and Eco-Friendly: Top Tips for Maintaining Your Hybrid Car
 Essential Tools for DIY Car Maintenance: A Comprehensive Guide
 Preparing Your Car for Winter: A Complete Maintenance Checklist